|
|
||
|---|---|---|
| .. | ||
| README.md | ||
| README.zh-cn.md | ||
| alist_mount_path.en.png | ||
| alist_mount_path.zh.png | ||
| alist_rs_settings.en.png | ||
README.md
AList
English | 中文
Links
- English official website: https://alist.nn.ci/ and https://alist.nn.ci/guide/webdav.html
Steps
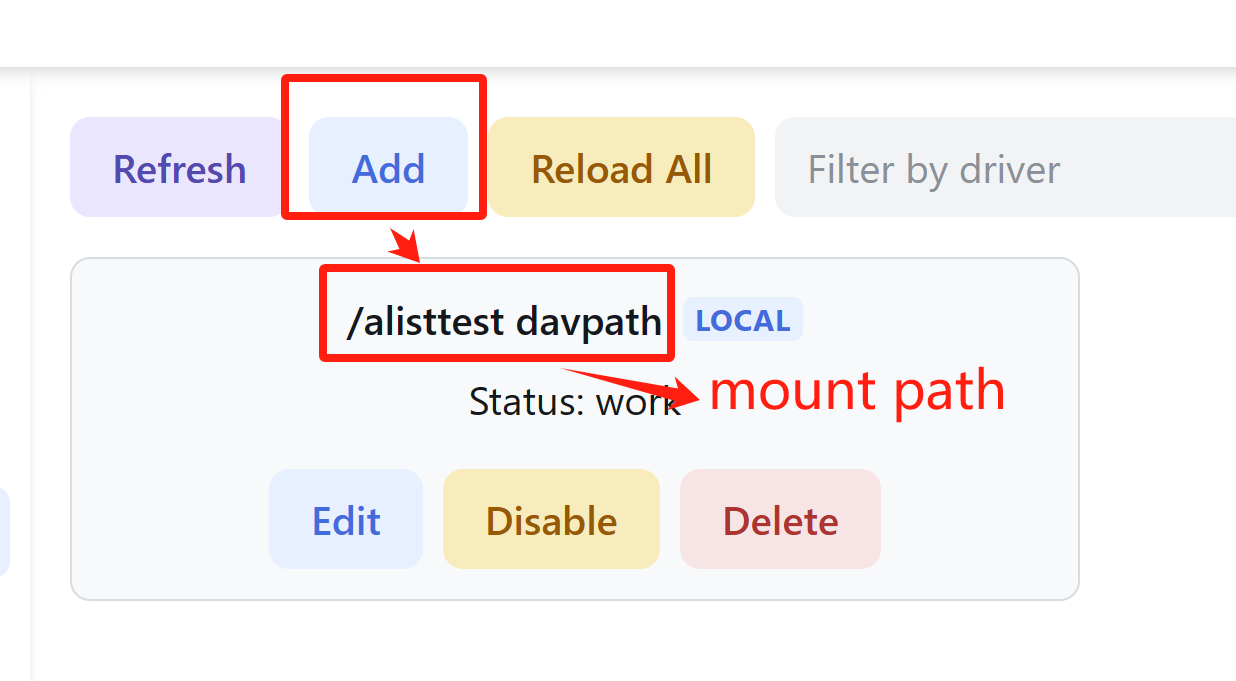
- Install and run AList. Get the account and password. Login using the web page.
- Add new storage. Pay attention to the mount path. The screenshot shows the mount path as
/alisttest davpath.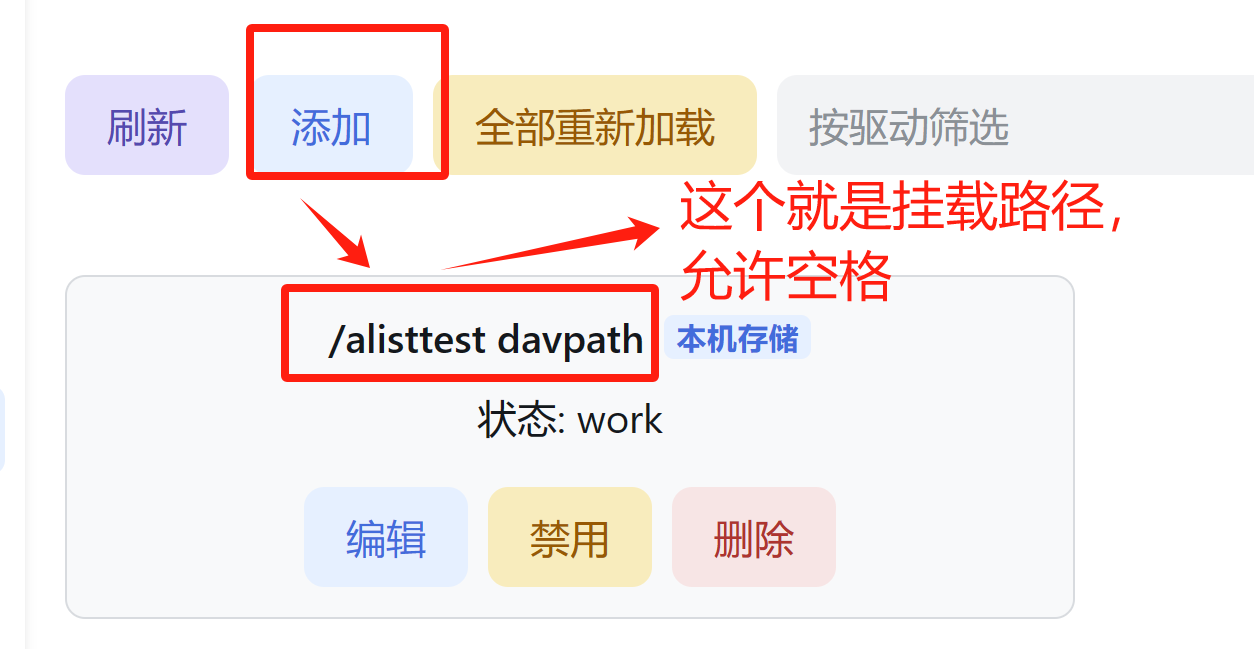
- Construct the webdav address as: http(s)://domain + port +
/dav+ mount path, and the space inside the mount path should be replaced with%20:http[s]://domain:port/dav/[mountpath url encoded] http://127.0.0.1:5244/dav/alisttest%20davpath - In remotely-save setting page, select webdav type, then input the full address with mount path/account/password.
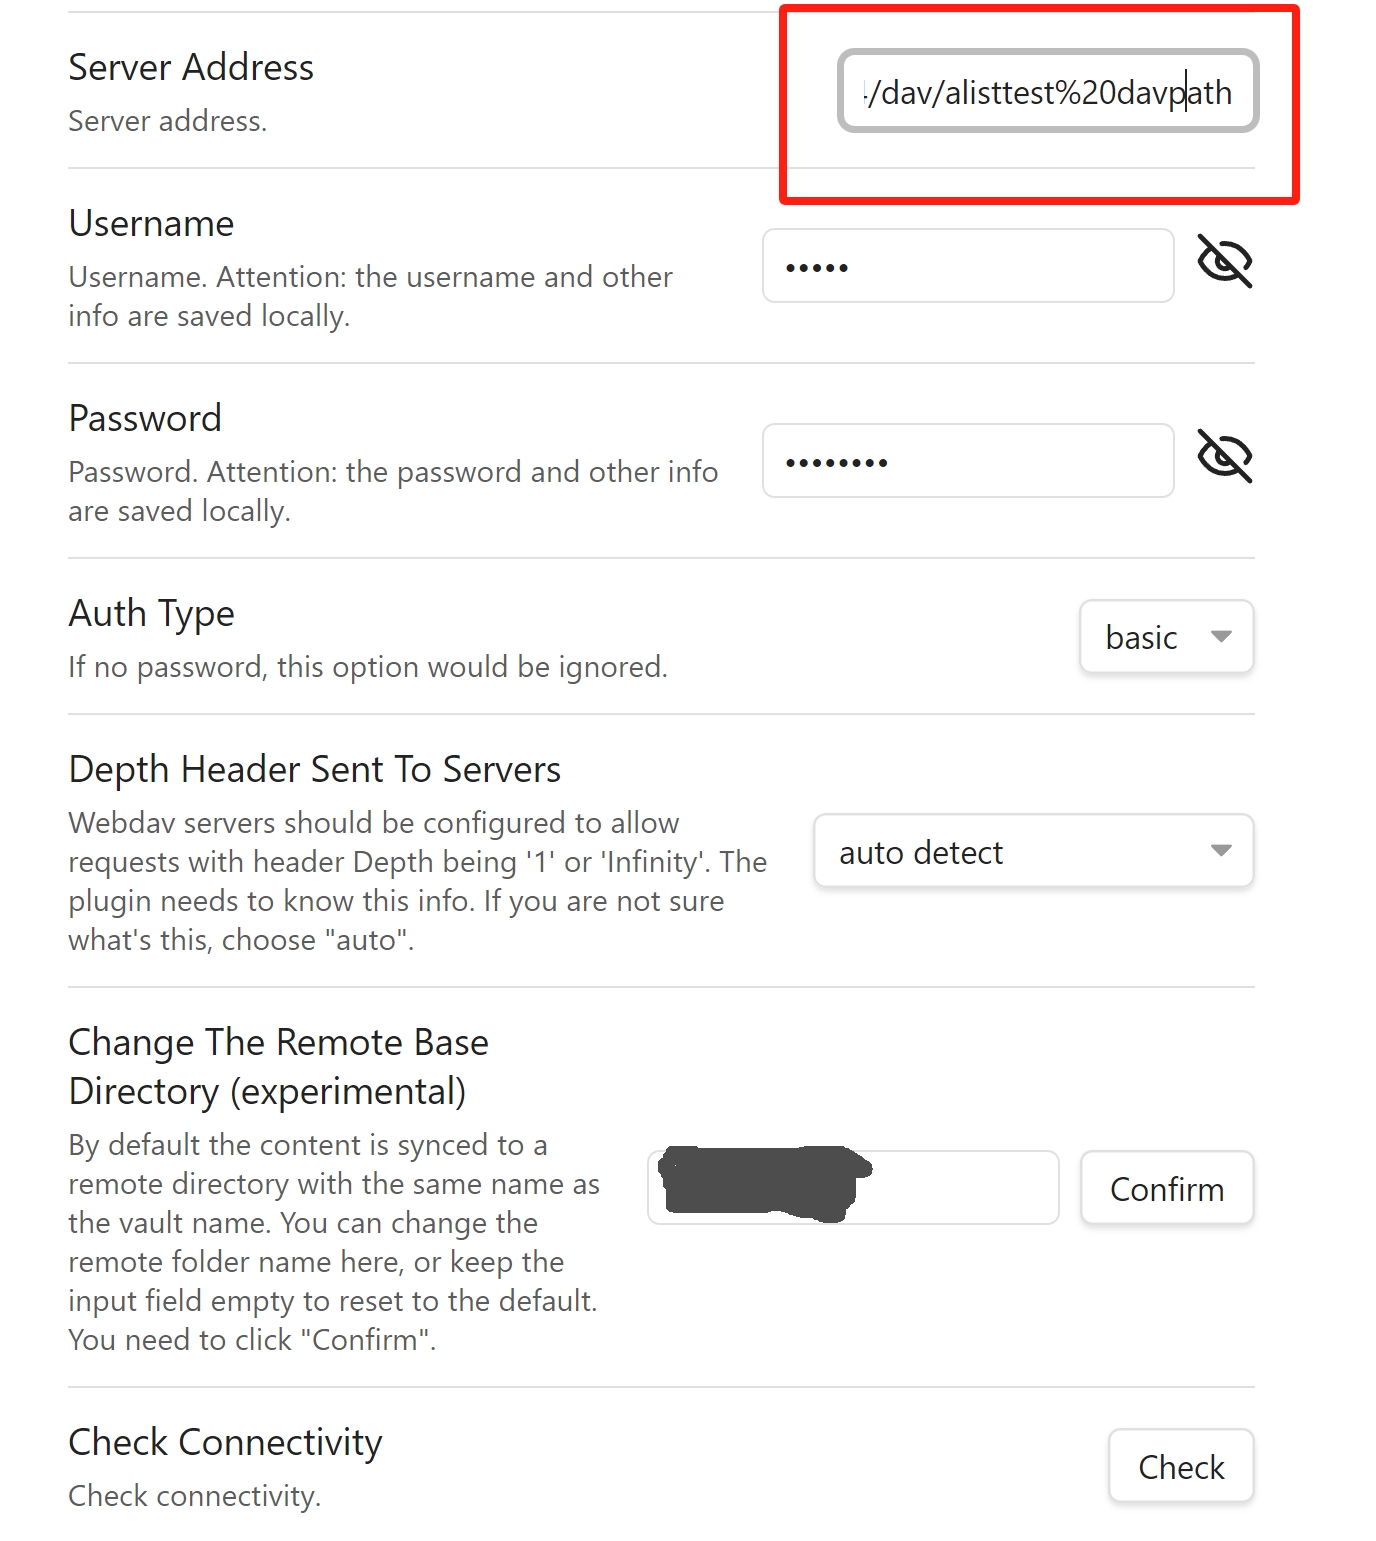
- In remotely-save setting page, click "Check Connectivity".
- Sync!