| .github/workflows | ||
| docs/img | ||
| public | ||
| src | ||
| .gitignore | ||
| Dockerfile | ||
| index.js | ||
| LICENSE | ||
| package-lock.json | ||
| package.json | ||
| README.md | ||
Firefly III AI categorization
This project allows you to automatically categorize your expenses in Firefly III by using OpenAI.
Please fork me
Unfortunately i am not able to invest more time into maintaining this project.
Feel free to fork it and create a PR that adds a link to your fork in the README file.
How it works
It provides a webhook that you can set up to be called every time a new expense is added.
It will then generate a prompt for OpenAI, including your existing categories, the recipient and the description of the transaction.
OpenAI will, based on that prompt, guess the category for the transaction.
If it is one of your existing categories, the tool will set the category on the transaction and also add a tag to the transaction.
If it cannot detect the category, it will not update anything.
Privacy
Please note that some details of the transactions will be sent to OpenAI as information to guess the category.
These are:
- Transaction description
- Name of transaction destination account
- Names of all categories
Installation
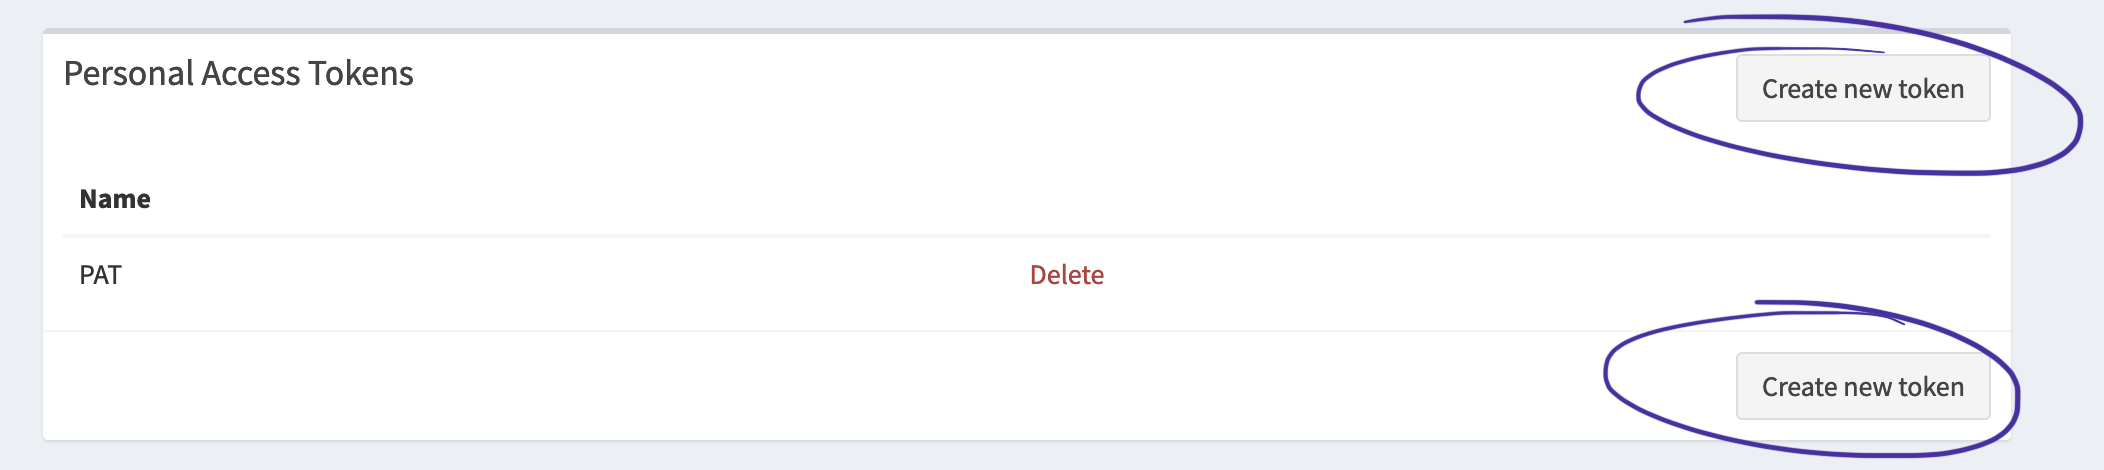
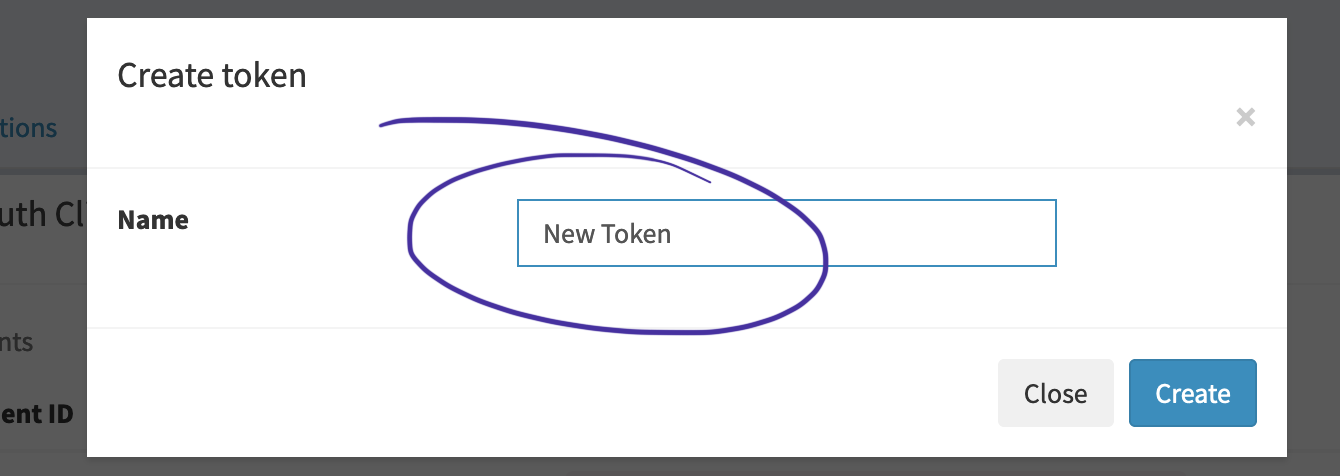
1. Get a Firefly Personal Access Token
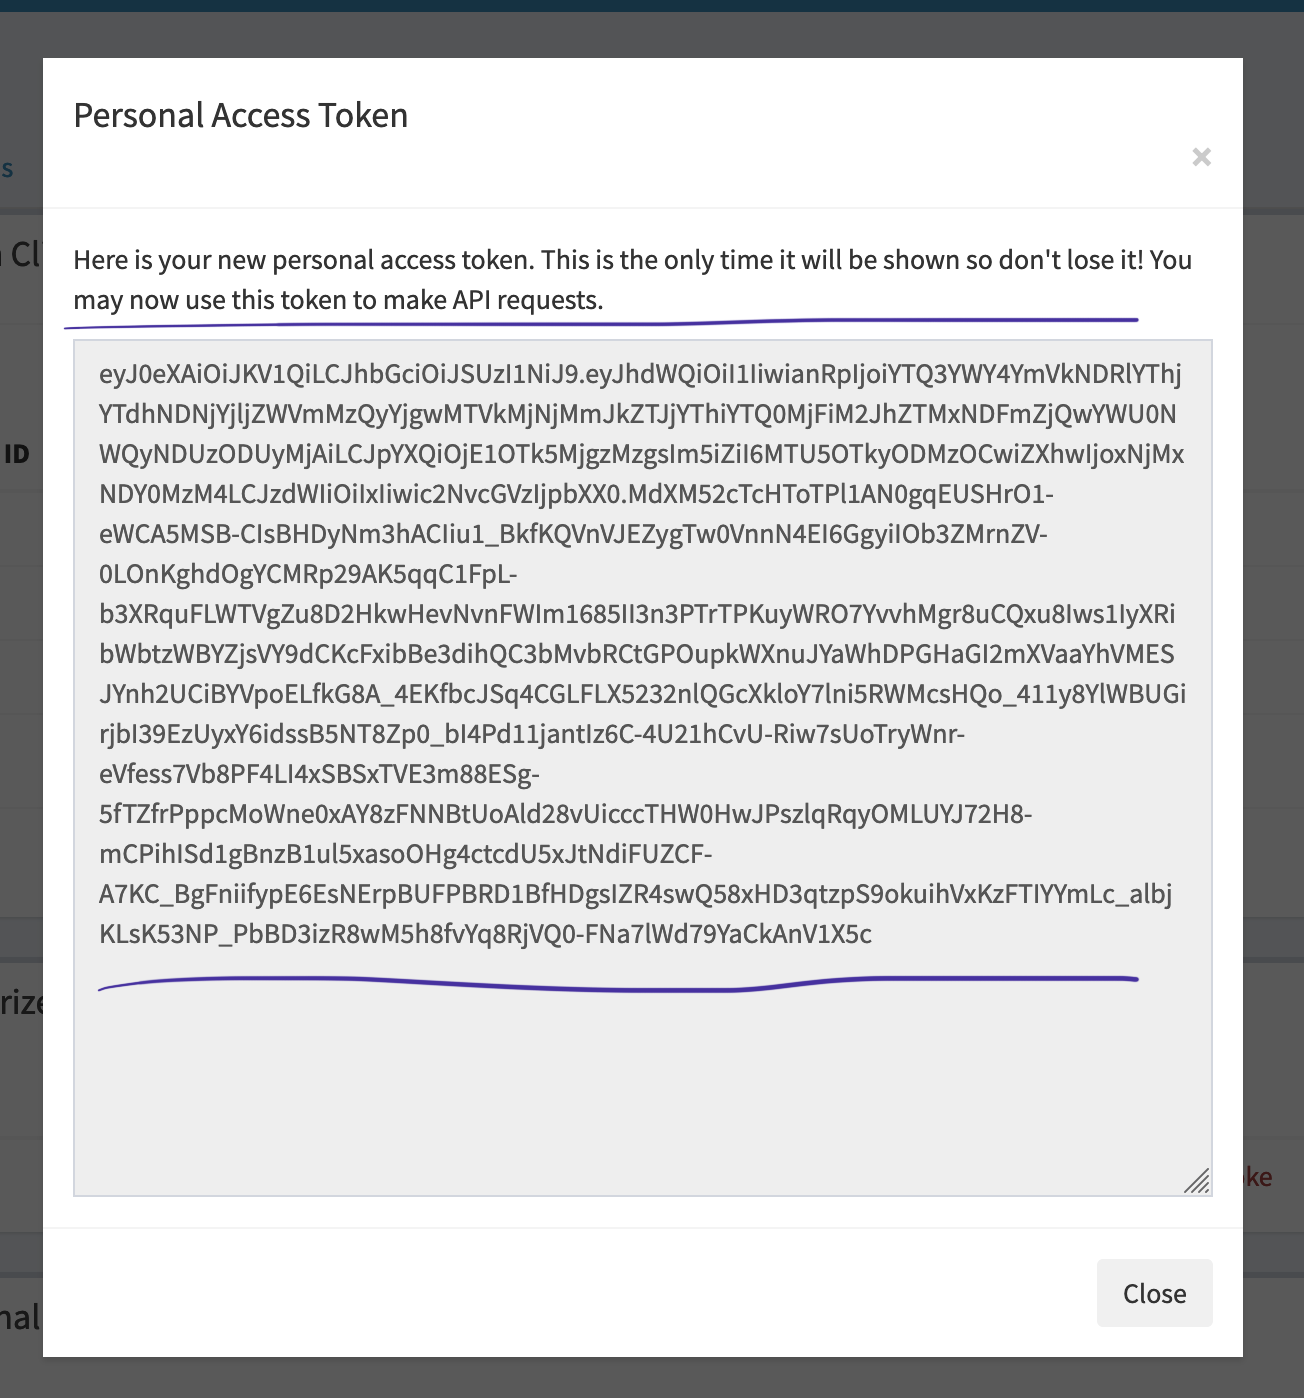
You can generate your own Personal Access Token on the Profile page. Login to your Firefly III instance, go to "Options" > "Profile" > "OAuth" and find "Personal Access Tokens". Create a new Personal Access Token by clicking on "Create New Token". Give it a recognizable name and press "Create". The Personal Access Token is pretty long. Use a tool like Notepad++ or Visual Studio Code to copy-and-paste it.
2. Get an OpenAI API Key
The project needs to be configured with your OpenAI account's secret key.
- Sign up for an account by going to the OpenAI website (https://platform.openai.com)
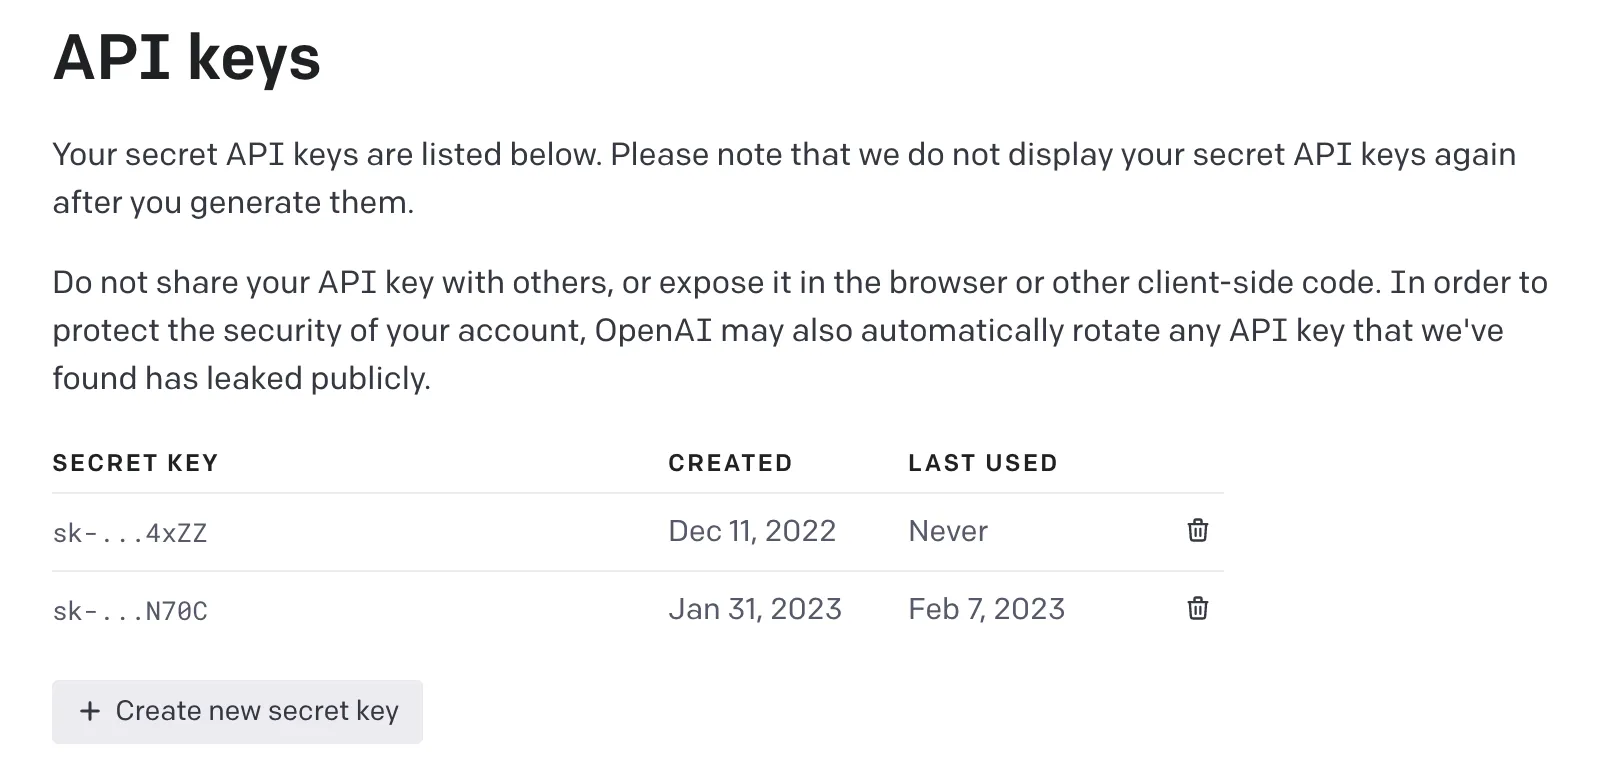
- Once an account is created, visit the API keys page at https://platform.openai.com/account/api-keys.
- Create a new key by clicking the "Create new secret key" button.
When an API key is created you'll be able to copy the secret key and use it.
Note: OpenAI currently provides 5$ free credits for 3 months which is great since you won’t have to provide your payment details to begin interacting with the API for the first time.
After that you have to enable billing in your account.
Tip: Make sure to set budget limits to prevent suprises at the end of the month.
3. Start the application via Docker
3.1 Docker Compose
Create a new file docker-compose.yml with this content (or add to existing docker-compose file):
version: '3.3'

services:
  categorizer:
    image: ghcr.io/bahuma20/firefly-iii-ai-categorize:latest
    restart: always
    ports:
      - "3000:3000"
    environment:
      FIREFLY_URL: "https://firefly.example.com"
      FIREFLY_PERSONAL_TOKEN: "eyabc123..."
      OPENAI_API_KEY: "sk-abc123..."
Make sure to set the environment variables correctly.
Run docker-compose up -d.
Now the application is running and accessible at port 3000.
3.2 Manually via Docker
Run this Docker command to start the application container. Edit the environment variables to match the credentials created before.
docker run -d \
-p 3000:3000 \
-e FIREFLY_URL=https://firefly.example.com \
-e FIREFLY_PERSONAL_TOKEN=eyabc123... \
-e OPENAI_API_KEY=sk-abc123... \
ghcr.io/bahuma20/firefly-iii-ai-categorize:latest
4. Set up the webhook
After starting your container, you have to set up the webhook in Firefly that will automatically trigger the categorization everytime a new transaction comes in.
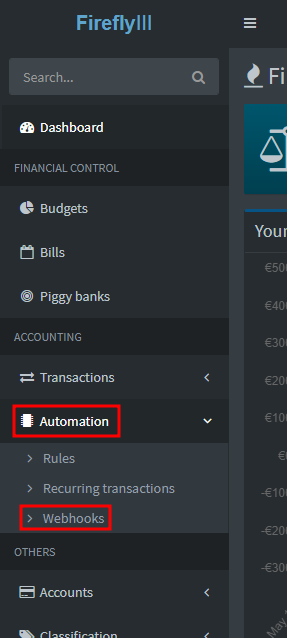
- Login to your Firefly instance
- In the sidebar go to "Automation" > "Webhooks"
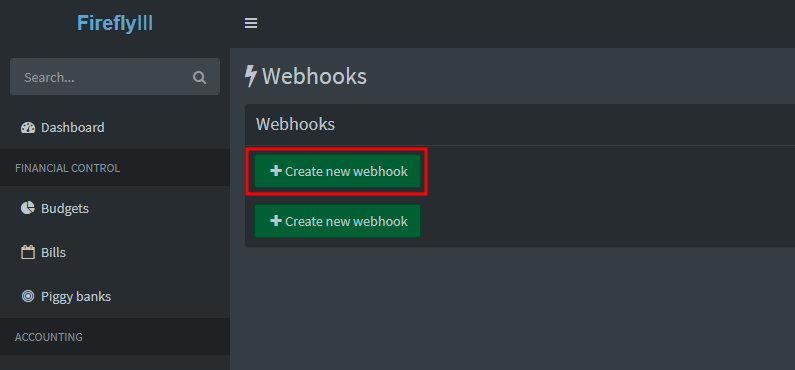
- Click "Create new webhook"
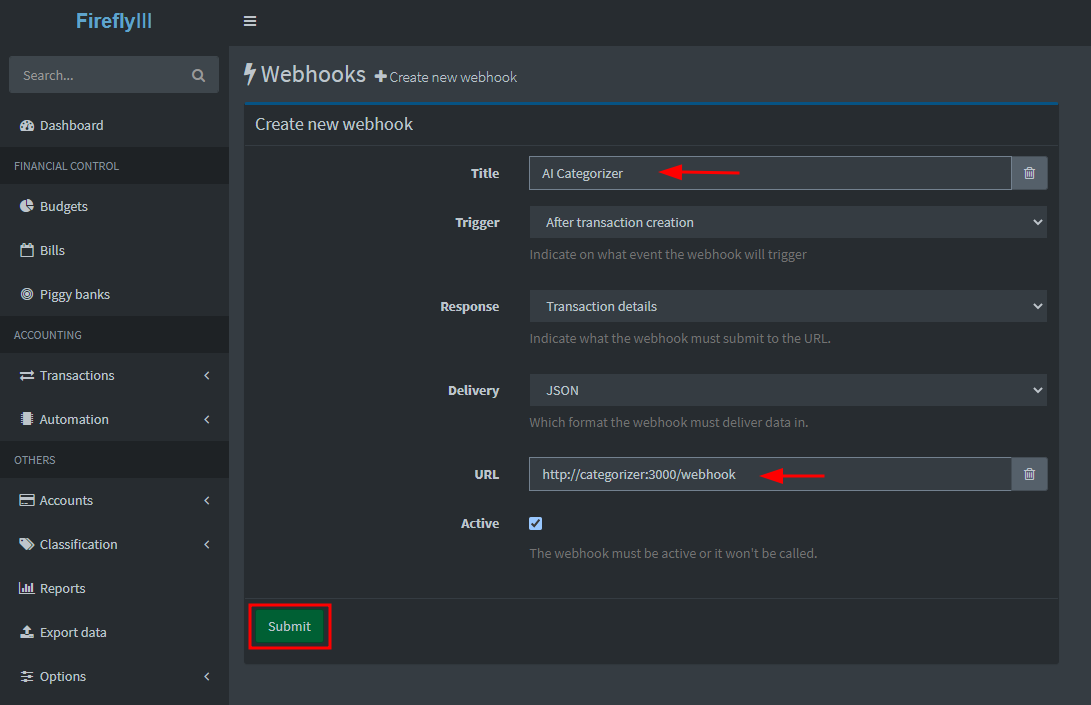
- Give the webhook a title. For example "AI Categorizer"
- Set "Trigger" to "After transaction creation" (should be the default)
- Set "Response" to "Transaction details" (should be the default)
- Set "Delivery" to "JSON" (should be the default)
- Set "URL" to the URL where the application is reachable + "/webhook". For example if you are using docker-compose your
URL could look like this:
http://categorizer:3000/webhook - Click "Submit"
Now you are ready and every new withdrawal transaction should be automatically categorized by OpenAI.
User Interface
The application comes with a minimal UI that allows you to monitor the classification queue and see the OpenAI prompts and responses. This UI is disabled by default.
To enable this UI set the environment variable ENABLE_UI to true.
After a restart of the application the UI can be accessed at http://localhost:3000/ (or any other URL that allows you
to reach the container).
Adjust Tag name
The application automatically sets the tag "AI categorized" on every transaction that was processed and a category could be guessed.
You can configure the name of this tag by setting the environment variable FIREFLY_TAG accordingly.
Running on a different port
If you have to run the application on a different port than the default port 3000 set the environment variable PORT.
Full list of environment variables
FIREFLY_URL: The URL to your Firefly III instance. Example:https://firefly.example.com. (required)FIREFLY_PERSONAL_TOKEN: A Firefly III Personal Access Token. (required)OPENAI_API_KEY: The OpenAI API Key to authenticate against OpenAI. (required)ENABLE_UI: If the user interface should be enabled. (Default:false)FIREFLY_TAG: The tag to assign to the processed transactions. (Default:AI categorized)PORT: The port where the application listens. (Default:3000)