1.9 KiB
Synology Webdav Server
English | 中文
Link
https://kb.synology.com/en-global/DSM/tutorial/How_to_access_files_on_Synology_NAS_with_WebDAV
Attention
The tutorial author (the author of Remotely Save) is NOT an expert of NAS / Synology. Please read the doc carefully and change it to accommodate your needs by yourself.
It's dangerous to expose your NAS into public Internet if you don't know how to set up firewalls and other protections.
Steps
Synology DSM 7 is used in this tutorial.
-
Create a new shared folder if you don't have one. For this tutorial, a new shared folder
share2is created. You should assing a proper user to read / write the shared folder.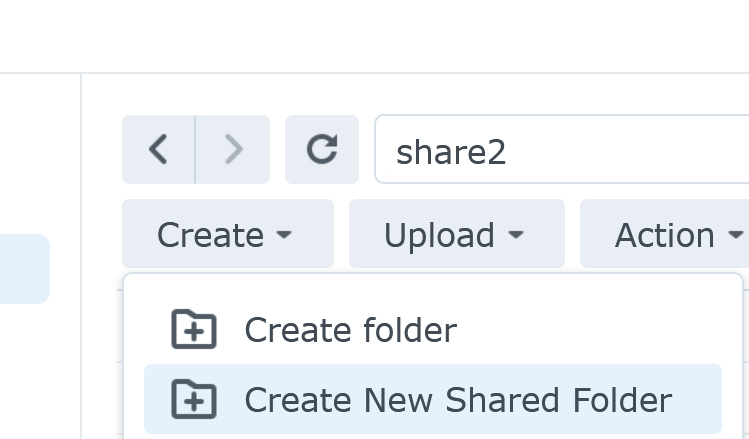
-
Assuming you want to sync your vault into sub folder
哈哈哈/sub folder, please create the sub folder(s) correspondingly inide the shared foldershare2. -
Install webdav server from package center.
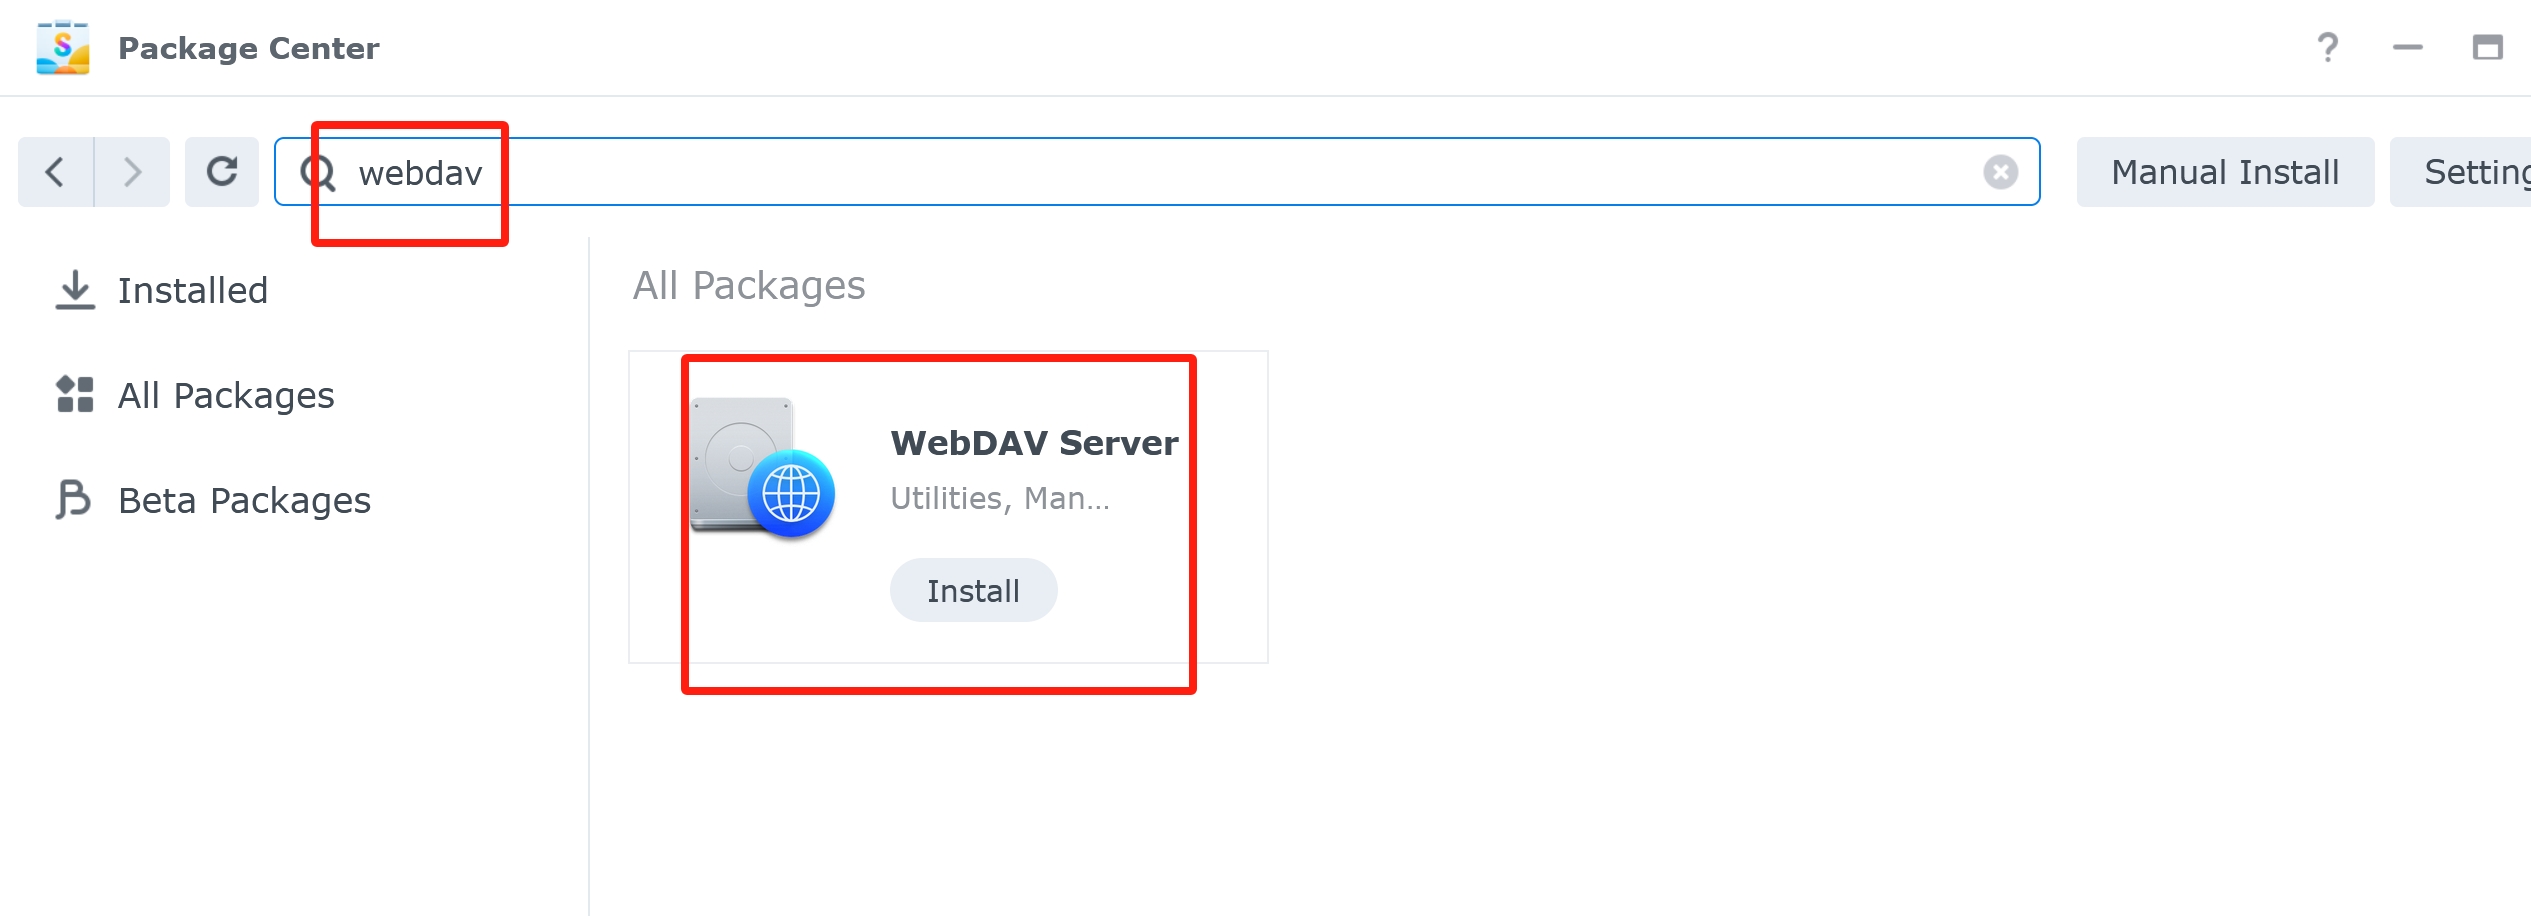
-
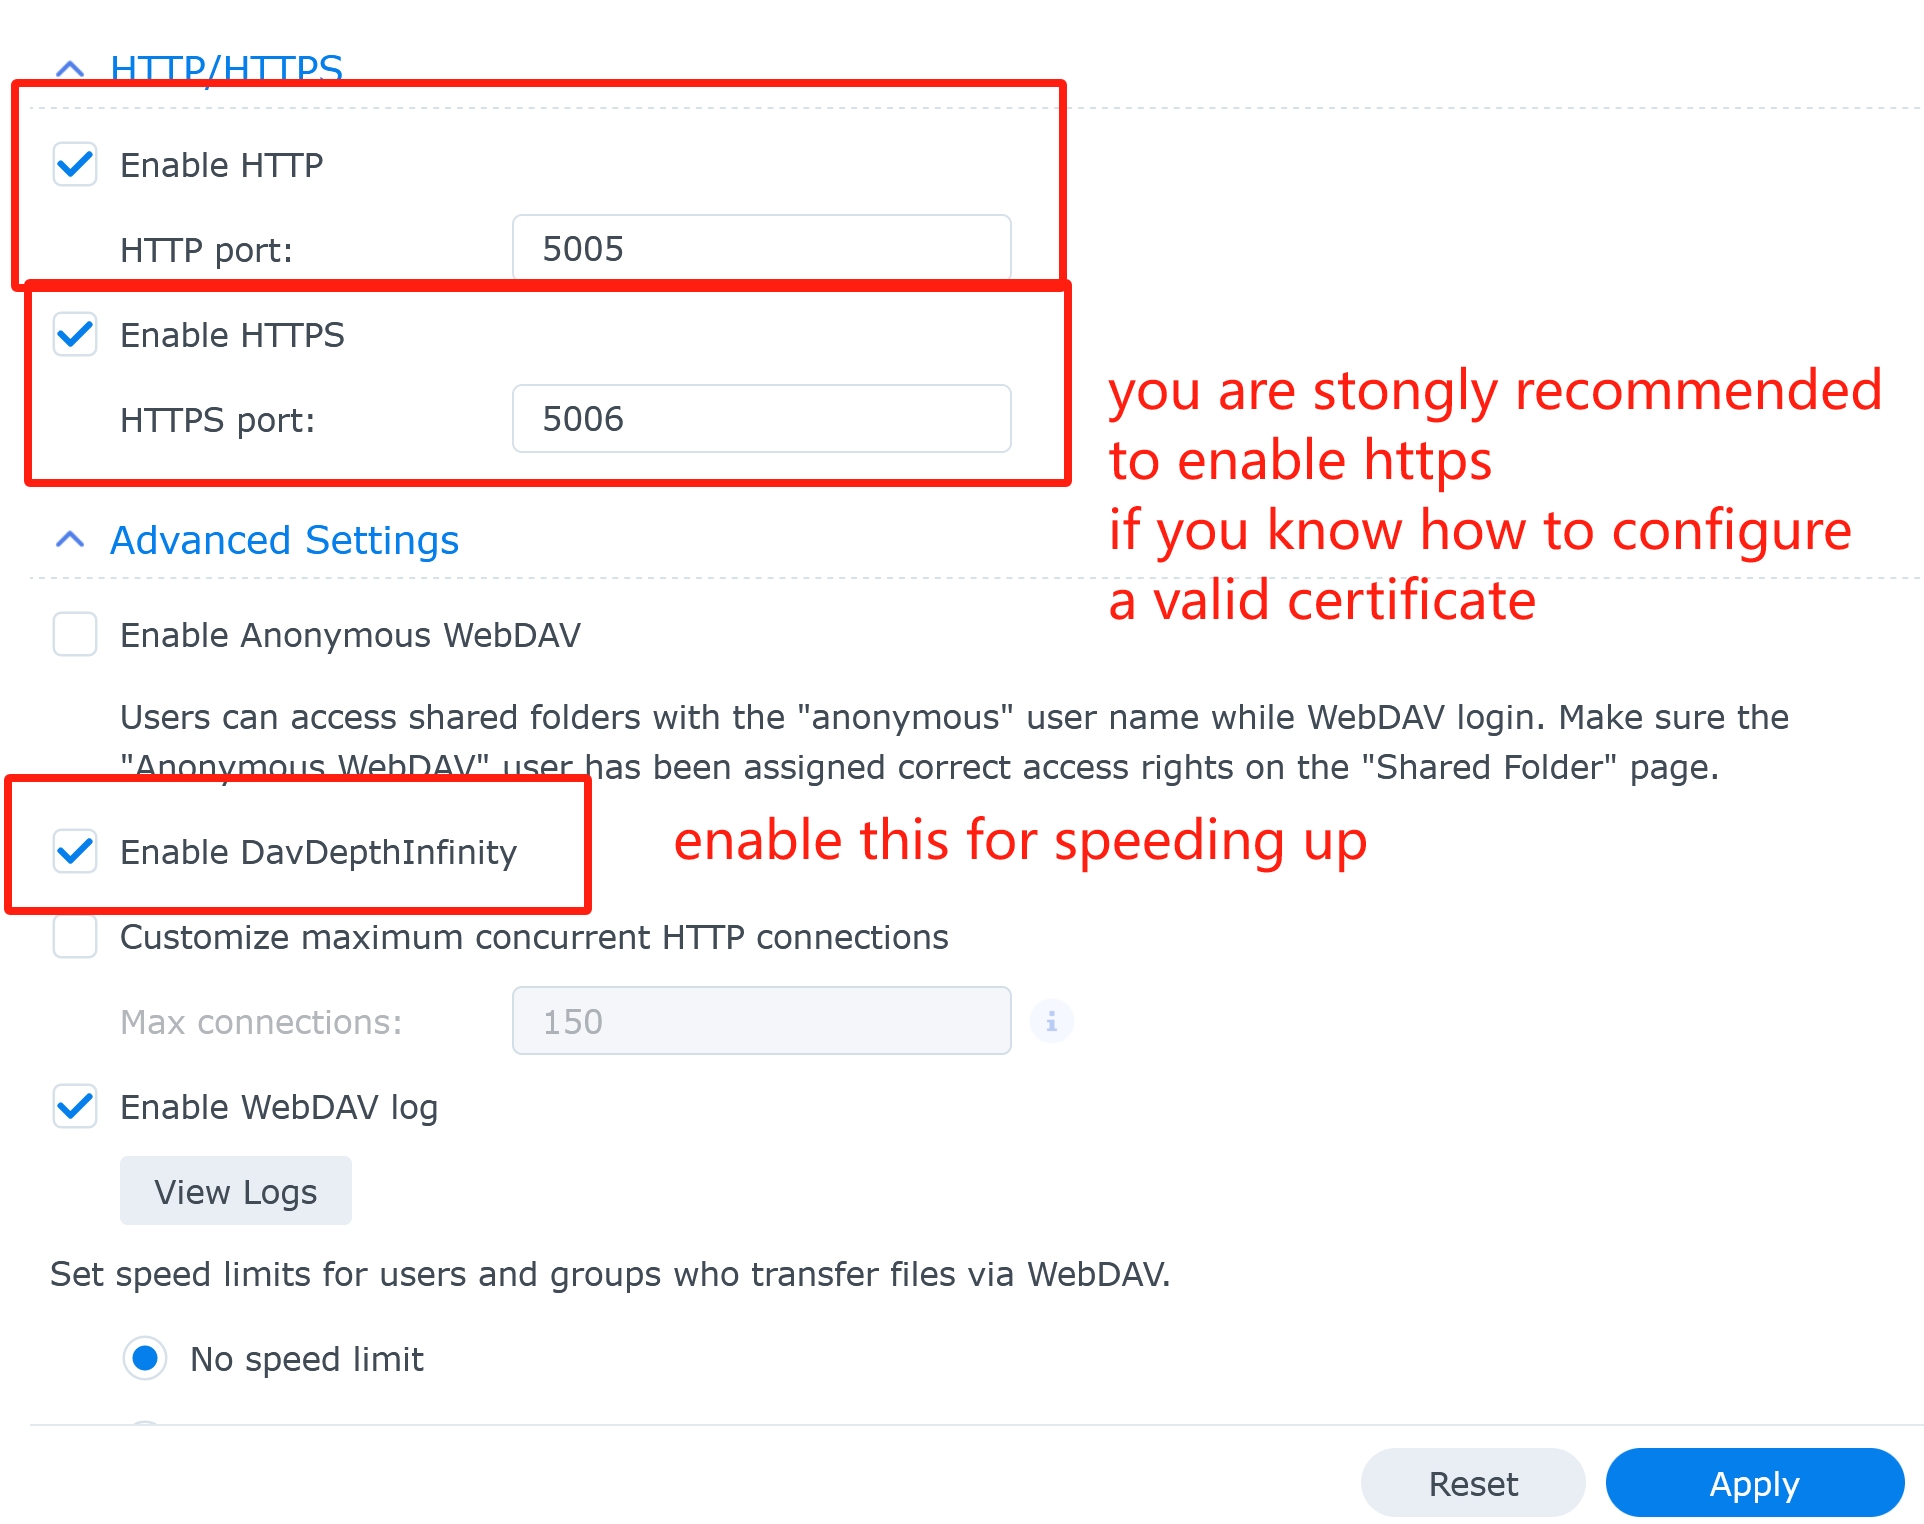
Enter the webdav server settings.
-
If you know how to configure https certificates correctly, you are strongly recommend to enable https.
For the demonstration purpose, this tutorial enable http server for the later steps.
Also "Enable DavDepthInfinity", which could speed up the plugin runnings greatly.
"Apply".
-
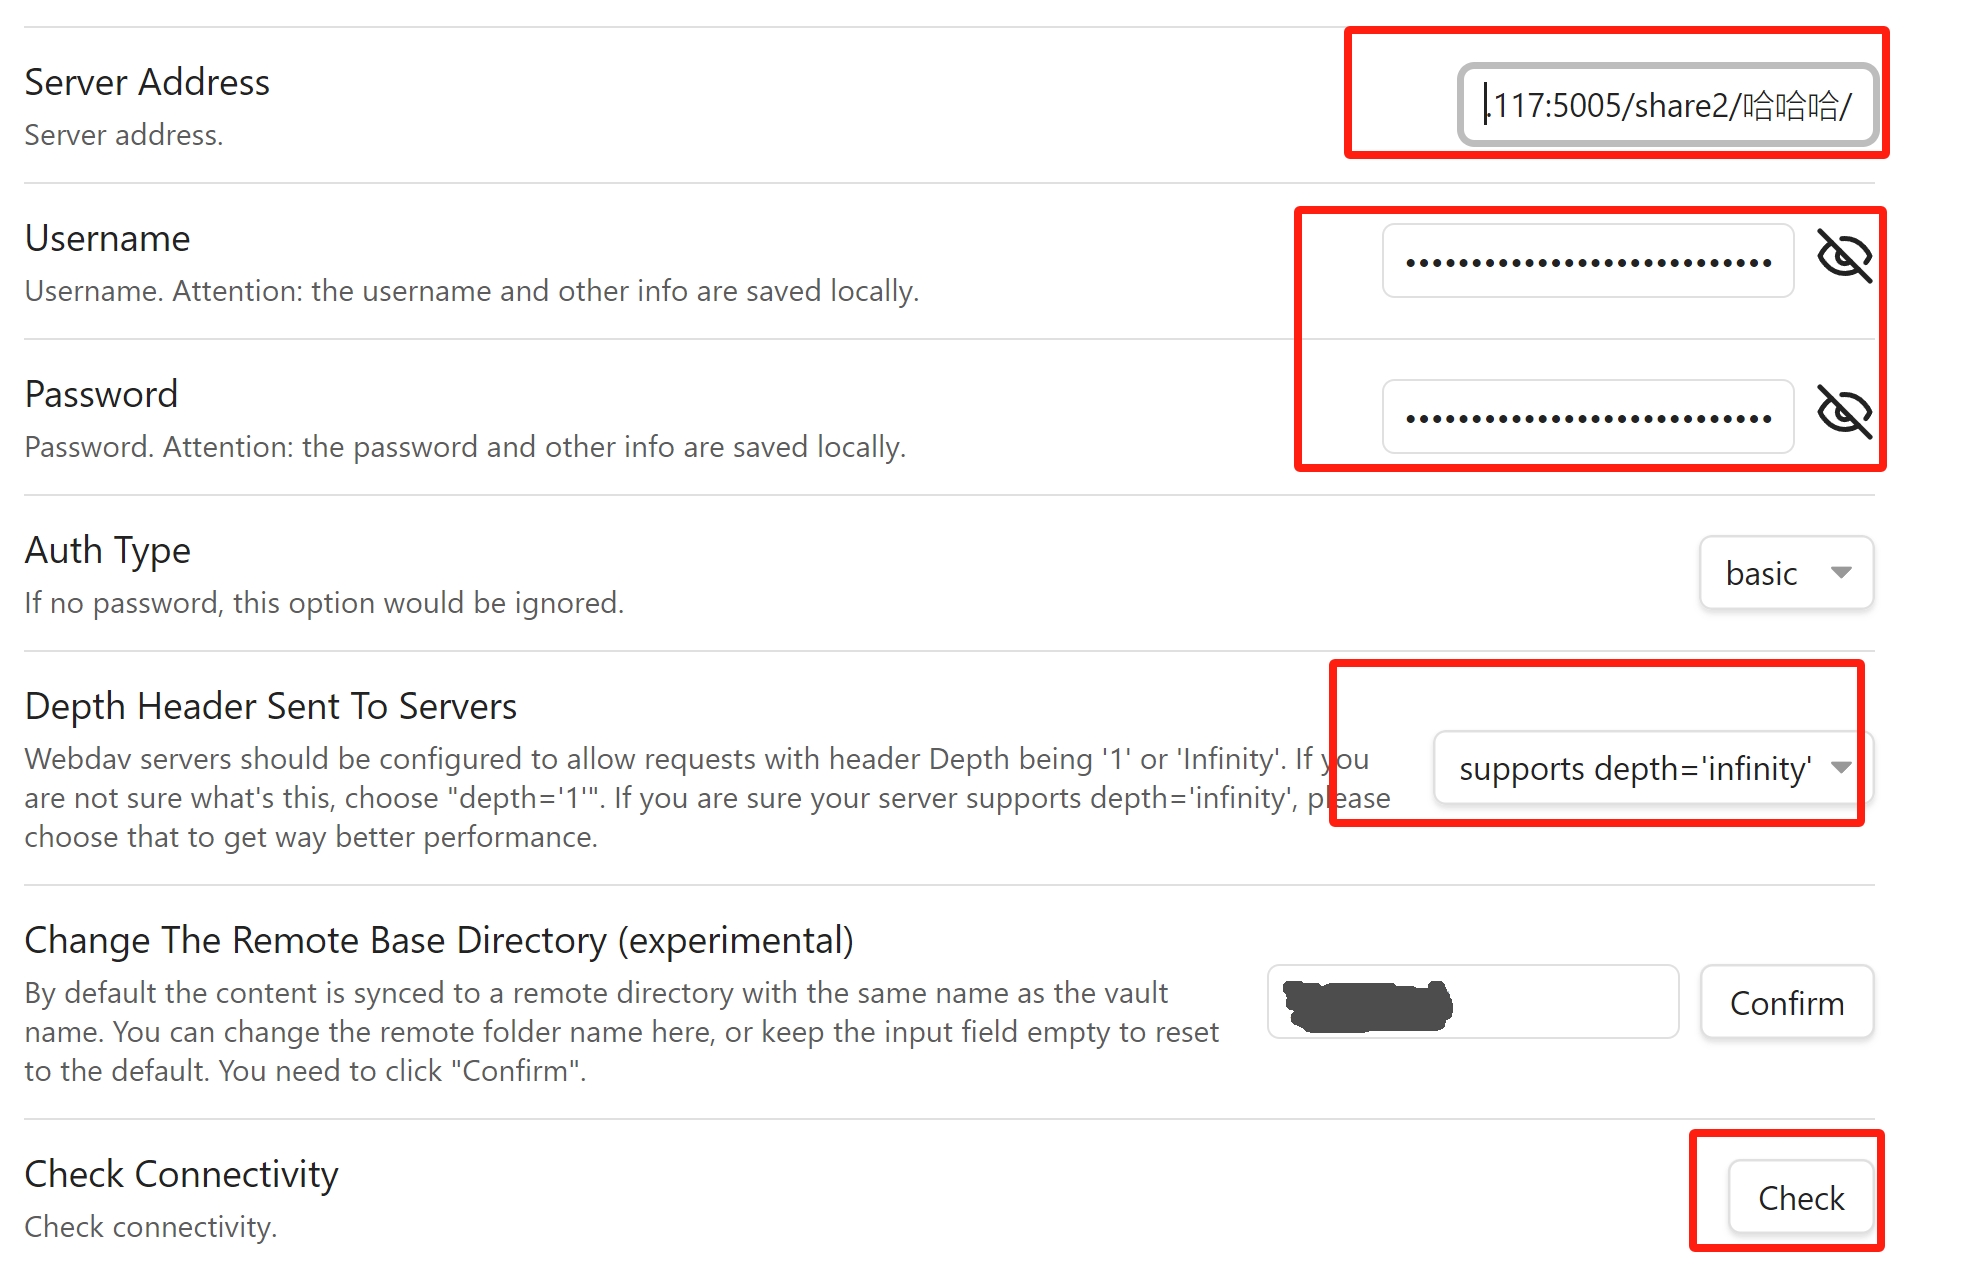
In Remotely Save settings, you should input your address as:
http(s)://<your synology ip or domain>:<port>/<shared folder>/<sub folders>For example, in the tutorial, the proper url should be:
http://<ip>:5000/share2/哈哈哈/sub folderUsername and password should be the user you configured before with read / write permissions to
share2.Depth header should be "supports depth="infinity"".
Check connectivity!
-
Sync!